Arduino Episode 2 — Buttons, display and shield
I'm adding pieces and understanding something
Published on
What has happened today?!?
Big movements forward with the Arduino MKR WIFI 1010. A dear friend helped me understand a lot of things. Without him I would have lost a lot—really a lot—of time understanding where put things, connect them and understand some key concepts. So yes, it’s better together.
It’s already late for today, so let’s see what we’ve done, shall we?
Buttons
It reminded me of the start of building a new design system. We started by adding some buttons.
In the beginning, it was just one. The goal was to see how to work with HIGH and LOW in the loop.
Here I used for the first time a breadboard. Probably it’s the most important thing to understand for a beginner. A breadboard allows you to connect all the parts without the need of soldering and to better distribute the cabling. It works by columns (+/-) and rows (numbers). On the - we put the GND (ground) and the power on the +.
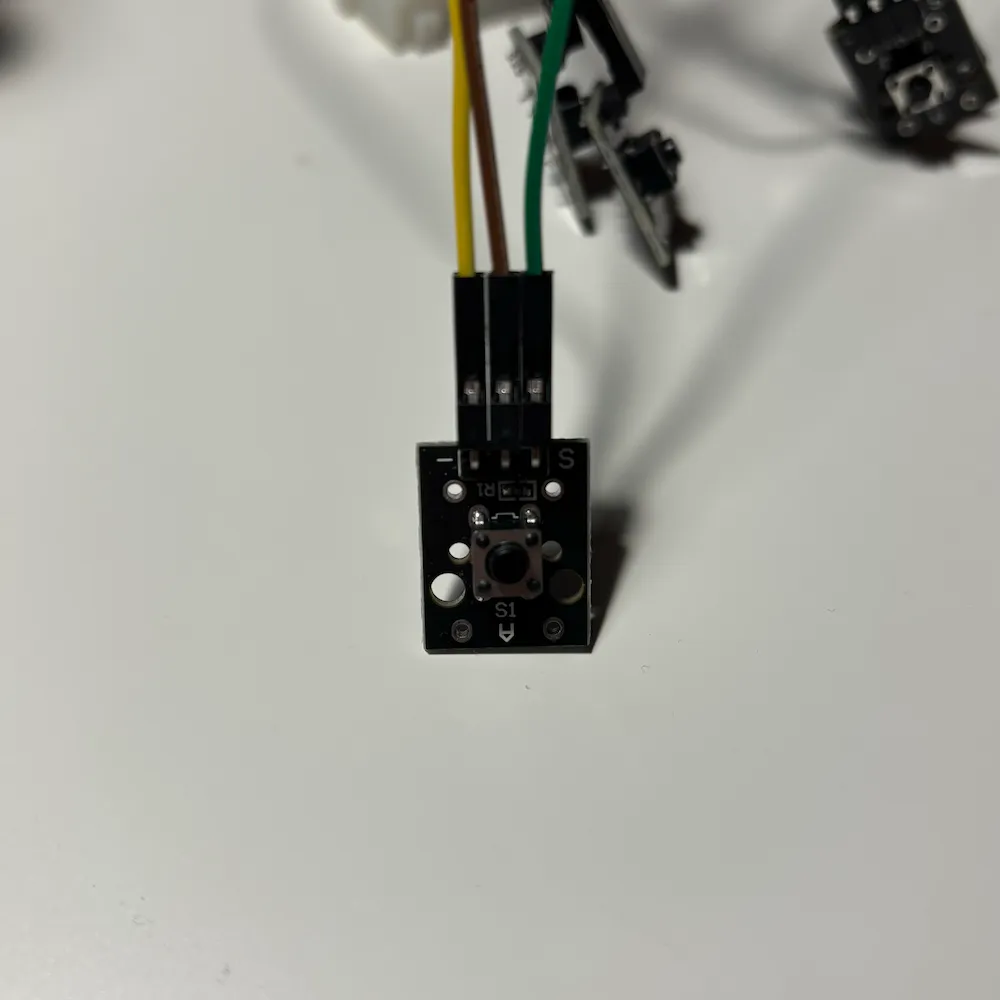
 The buttons I purchased must be connected with three cables. One is attached to the board using one of the numbered pins (0, for example). The other two are
 GND and VCC (power, 3.3v). We attached those last two on the + and - columns of the breadboard, in parallel to the cables that come from the board.
A little trick is to put the power cable on the - pint, the one on our left (yellow cable). It will save some energy consumption.
 Now a little bit of code for the buttons.
void loop() {
	buttonState = digitalRead(0); // Get the state of the button HIGH/LOW.
	if (buttonState == HIGH) { // If pressed
		Serial.println("Pressed!"); // Say it!
	}
}
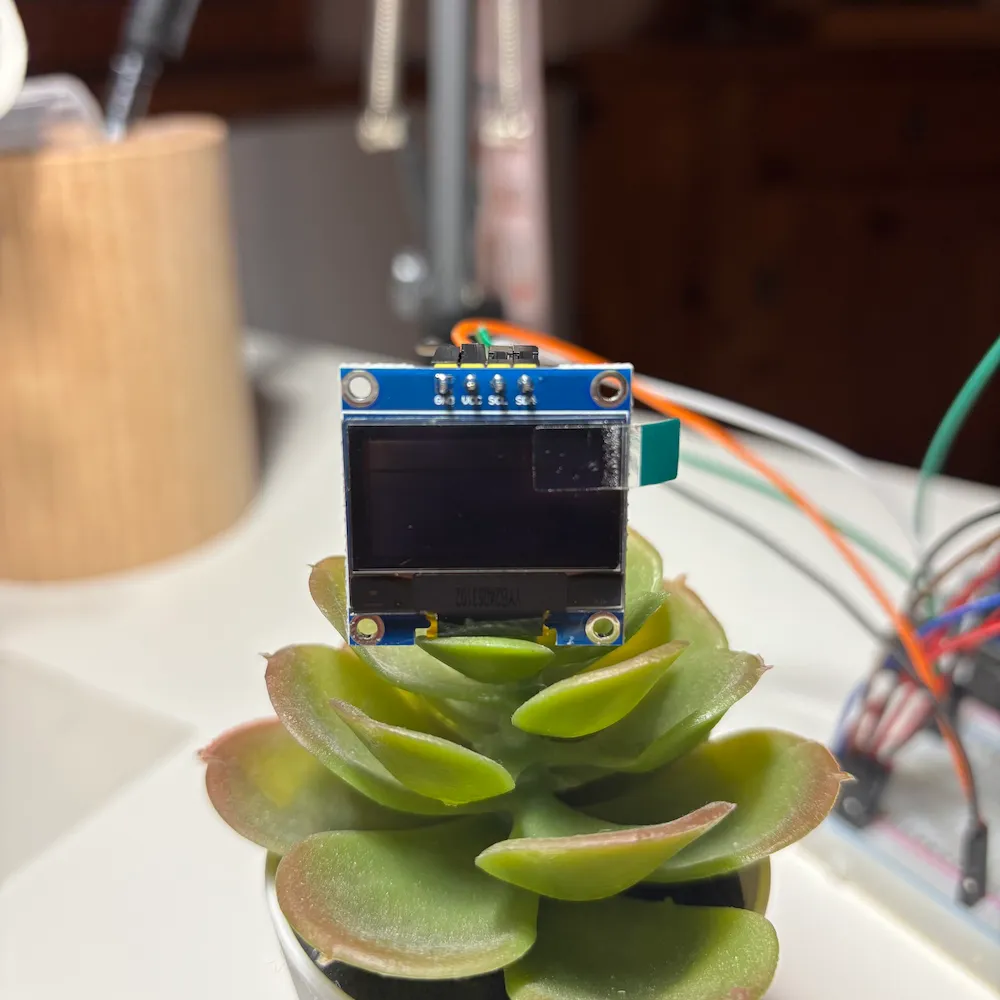
Displays
Here comes the hard part. Nothing was working. I even suspected it was broken.
Working with displays is challenging but fortunately, once you find a good library and understand a little how to use it everything becomes manageable.
In our case, we opted for the Adafruit_SSD1306 library. You can install it using the LIBRARY MANAGER of the Arduino IDE.
In this article, I don’t want to dwell too much on this part, even though it’s the juiciest. First, because I don’t want to say too much nonsense and second, there will be a way to go into more detail in future articles.
Some highlights:
- Since they didn’t work with the example in doc specific to my screen size we thought it was an address problem. No. It was the example. With the example in the doc for smaller sizes, we saw something move on the screen for the first time.
- Address
0x3Cwas the right one. - To use more than one display with the same address I need a
Multiplexer.
Some code:
// ...
Adafruit_SSD1306 display(SCREEN_WIDTH, SCREEN_HEIGHT, &Wire, OLED_RESET);
// ...
void setup() {
	display.setTextSize(1); // 8 pixels.
	display.setTextColor(WHITE); // The only color I can use.
	display.clearDisplay(); //
	display.print("Your content");
	display.display(); // Display the prepared content.
}
// ...
Shield
Probably the easiest part. Since it’s an Arduino shield you can attach it to the main board like a sandwich. It’s sufficient to install the dedicated library and you have direct access to the data using the exposed functions.
Some code that displays humidity value at every loop:
#include <Arduino_MKRENV.h>

// ...

void loop() {
	display.print(ENV.readHumidity());
}
It has been so easy compared to understanding the displays that I was—kind of—disappointed. I expected more required work. I know, it doesn’t make sense. Every easy victory helps move forward faster to new concepts.
Final result of the day
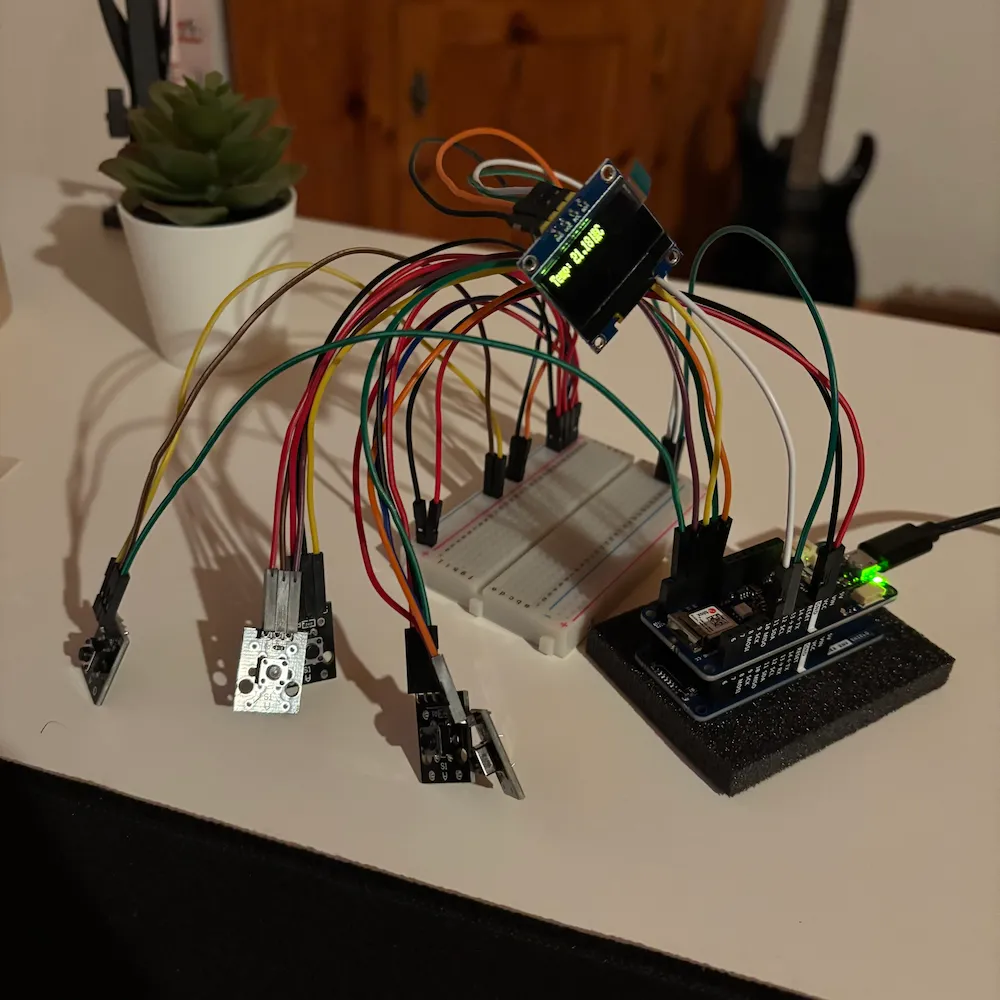 Every time I press a button it will show a different data that comes from the shield.
Not impressive, but it’s a lot for me in one day. Satisfying.
Every time I press a button it will show a different data that comes from the shield.
Not impressive, but it’s a lot for me in one day. Satisfying.
🦑🥰
Next steps
Next steps?
Design, design, and design. With some C study here and there.
I need to project the usage flow. Starting from the main menu that allows the user to select, configure, and start things.
I’ve loads of ideas.